
The Power of Content Editor WebPart
The Content Editor WebPart (CEWP) is one of the simplest webparts that come out-of-the-box with every SharePoint release. It just holds the text/code we instruct it to hold. This simplicity is also hiding great power, as it can hold HTML, JavaScript and CSS to help us manipulate the rest of the page. In this (at least) 10-part series we’ll get to know, through practical examples, how to use JavaScript, HTML and CSS and even SharePoint’s OOB web services to add that additional spark into your SharePoint site.
There are already numerous solutions out there providing very cool features for SharePoint, but the purpose of this series is to show how you can start making your own.
We’ll learn how to Change Appearance of SharePoint Page, insert text where it doesn’t exist, enhance List Views, add functionalities (like validation) to SharePoint list forms, get SharePoint data from a list through services and render it using Ajax, etc. Those are only couple of cool examples of what you can do with SharePoint.
The advantages of this kind of approach are: fast deployment and debugging, no need for access to server’s GAC and backend, high adaptability, and some more.
The downside of this way is that you have to insert the CEWP with script in EVERY page that you want your script to run.
Jump start
If you’re eager to get a jump start and see all the examples we’ll cover in action, you can download the full-featured site template from my CodePlex site. It’s just a Team site, armed with CEWPS and code snippets. More info can be found in this post.

Perquisites
CEWP comes with only one downside. Poor Source highlighting (considering you have to write HTML/CSS/JavaScript into it. I recommend using a good text editor that supports code highlighting and management. One of my favorites is Notepad++ as it supports very good code highlighting, open and closed tags highlight, side-by-side comparison (even of the same file),… SharePoint Designer is also good.
Other important tool is Internet Explorer Developer Toolbar – which comes installed with IE 8+ (Developer tools). If you’re using IE7 you can find it here or simply upgrade to IE8. This tool helps to Explore and debug HTML DOM.
As for the rest of the tools – we’ll get to know them on the way. They’re all available free.
Even though most of these examples can be copy-pasted and some parts will be explained in detail, it is useful to know JavaScript, HTML and CSS.
What you can’t do
It is also important to emphasize what you can’t do with plain JavaScript/CSS/HTML:
- The most important: you can’t leverage rights – or in other words: you can’t do something you don’t have right to do. If a user will run a script to read from a list that he has no access to, he will not get any results.
- You can’t modify DOM before it’s loaded. One most common mistake when using this approach is when you try to get an HTML element on the page that doesn’t exist yet. An example is that you try to show/hide a form field in SharePoint New/Edit form before the field is rendered (CEWP with JavaScript is inserted before the form).
Let’s get started:

|
1. Inserting CEWP and managing codeWe know how to insert CEWP in Web Part Pages and HomePage. What about in pages where this isn’t available? We’ll also get to know couple of useful tips on how to manage code with CEWPs. |

|
1a. Getting to the objectOnce we have everything ready and we want to start coding we first need to find the object we wish to start manipulating in the HUGE SharePoint’s Document Object Model (DOM). After we have the object, we can get dirty and manipulate it. |

|
2. Toggle Quick LaunchEven though there already exists a script for toggling Quick Launch, we’ll make our own to get to know how to make. We’ll get to object that has no ID using its CSS class. We’ll also add some content to where it doesn’t exist so we’ll create a link that will toggle the quick launch. |

|
3. Quick Search in List ViewNow we’ll learn some serious DOM traversing and iterating through element’s parents and child nodes. We’ll show how easy is to create a JavaScript filter-as-you-type for a list view. It is “filtering” only rows of data displayed on the page though. |

|
4. Highlight weekends in List ViewWe’ll use the calculated column to help us with dates to show which days are weekends and using JavaScript we’ll pant those rows red. |

|
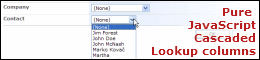
5. Alphabetical List View Quick FilterAnother good use of calculated field is for applying filters without making extra views. We’ll also see how to filter List Views using URL. This may come in handy for large lists. |

|
6. Attaching events to form fieldsWhat if we pimped up our form a little. Using JavaScript through CEWP we can liven up our form – helping us pre-fill some data, making some actions based on selections, etc. We can turn the static form into a dynamic one. In this article we’ll make a simple example on tasks list – based on project status the “% Complete” field will pre-fill automatically. |
|
|
7. List form Live ValidationEven if you make custom validation using JavaScript techniques from previous part you still can’t block user from clicking “OK” button at the end and submitting form with wrong data. We can prevent user to submit a form if data is wrong – even without postback feature. |
|
|
8. ERTE – Embed flash in SharePoint BlogERTE is a fine example of DOM manipulation and it is already described here. In this article we’ll get to know how to implement ERTE using CEWP. It’s very simple. |
|
|
9. AJAX AutoSuggestOK. Time to query SharePoint’s web services. Using jQuery’s AutoSuggest plugin and jQuery we’ll learn how to transform a simple single-line-of-text field into a full featured autosuggest field that gets its data from another list from Web Services. |
|
|
10. AJAX Comments submissionWe know how to query for data using SharePoint’s web services. What about writing data back? Yes. In this we’ll create a simple comments form for Announcements on our team site. We’ll get and show existing comments and make user submit new comments – all through AJAX. |
[…] You can find the series article here: The Power of Content Editor WebPart. […]
[…] https://sharepointboris.net/articles/the-power-of-content-editor-webpart/ […]
the best thing about IE8 is that it is quite stable than previous releases of Internet Explorer*,*
Just found this, superb series! Who knew how much you could do through this webpart?! I was actually looking for a way to hide a field in an edit list item form without a custom feature or PowerShell Script!
Keep ’em coming! 😀
Here is a tutorial might be helpful to you !!!
http://www.fewlines4biju.com/2011/08/content-editor-web-part-in-sharepoint.html
Is there a way to hide SharePoint page elements(like div tag) using content editor without causing flicker?? I have a solution but its causing flicker.